Sunday, April 10, 2016

Office Chair Upholstery Upgrade

   I'm good at very few things, but the list of things I enjoy are endless. It's quite possible no sewing reupholstery might become one of those things.

   This lame office chair went from dirty and drab to clean and neat. You know, I could have chosen a patterned fabric which would look cute, but my desk is teal so keeping the fabric simple was best for me.

Here's what I started with.
I took it completely apart. The four bolts where the only thing keeping the seat to the legs.

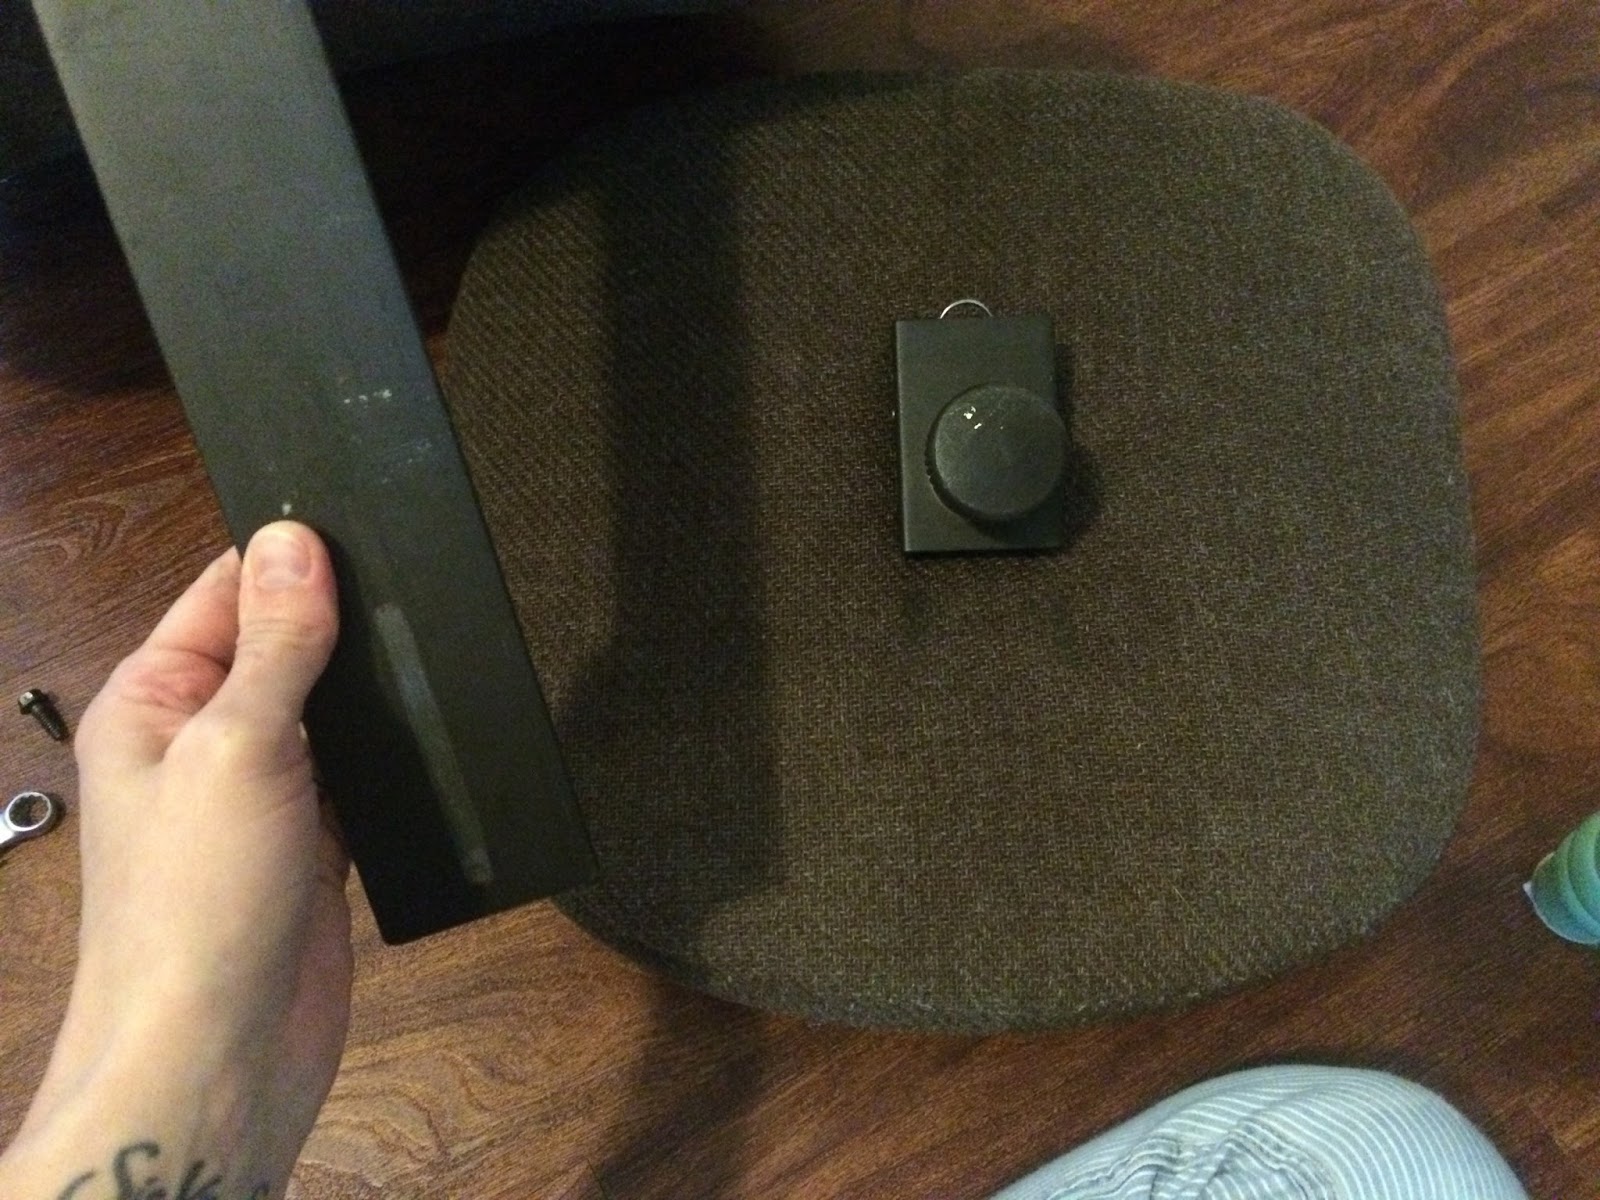
The round part unscrewed to take the bar off the back and seat. I couldn't get that tiny metal plat off so I have to work around it and stuff the fabric under it with a flathead screwdriver. 

Staple gun ready I stretch the fabric over the only fabric. If you need to add or replace the padding I suggest taking out all the staples to remove old fabric.
I decided to spray paint the base an antique copper color when I had it detached to freshen up the look. What was a pain is that the back separated and became two halves to cover with fabric. Once I pulled them apart I lost a lot of the nails holding the two sides together. I'll have to find some small nails to add to it to keep the halves attached to each other.
Other than that....not bad for my first upholstery project ever. 

Tuesday, March 29, 2016

Lusty Yellow Shelf Turned Dual Toned

  Wow two months can go by in a blink of an eye. I've only been working on a few small projects recently, but every time we visit my husband's family in Kentucky I seem to acquire quite a bit of new projects to do. His mom takes me to all the hot spots for treasures!
  I picked up this shelf at an Antique Market the last time I was in Kentucky and decided to give it a face lift. I am one of those few people who love yellow which drew me into purchasing it, but I then felt like I needed to make it look..... older. When I say older I don't mean aged (this time), I mean grown-up.


  First, I removed the over painted piece of wood used as the shelf and made my own out of new wood, but to fit and stained it a lovely walnut. Next all I did was spray paint the metal swirl design with hooks a cream color of chalk paint. Then, put the new shelf in. 

I liked it before, but now I love it! Not bad for a 2 hour project!

Sunday, January 31, 2016

Wooden Box to Wine Rack

     I have a number of those old wooden boxes, all shapes and sizes, that I've collected throughout the years. Well, my husband would say it was a ridiculous amount, but I would call it a perfect variety of future ideas. Once friends and family found out about them it seems they start collecting for me as well and that's when I realized I need to breath new life into them before it gets out of control.
     I started with this:

     I could have used one a bit smaller, but I really like the label detail on the sides of this one.
Then, using the circular cutting bit on my Dremel I measured out 3.5" circles to fit across open at the top so I can lift it out if I need to. You can just make holes, but sometimes I buy those really fat bottles that I would like to be able to set in there but wouldn't be able to pull all the way through if they weren't open.
     The result was this:
     The cuts were a little rough until I got the hang of it so I sanded the edges with 100 sandpaper. It was the first time using this attachment on my Dremel....kind of exciting!
I realized my bottles rolled around in there a little too much so I decided to use some leftover wood I had from another project to build simple walls. This you can get at Home Depot. It's 2" x 36" x .25". I cut and glued them down and to each other in the box with wood glue.

Now I can buy extra bottles of wine to have on hand. Gotta love that!


Thursday, January 21, 2016

Whimsy-ish Wooden Whales

     Whales are popping up all over the place these days. My dad was cutting a few of these little guys out of some left over plywood for a project my mom was working on and I just had to have a few. I decided to give them a geo/vintage look.... if that's a thing.

     First, I used my Dremel to soften the front edges of the wood, create some wear and tear and some light eyes and mouth detail. You may have to click to enlarge to see it.

     I painted them both a dark solid brown being sure to get it in the cracks. Once that layer was dry I went over it with the background colors you see purposely avoiding the cracks and dents to show the brown. For the designs I used my usual process of creating a laser printer transfer with the detail designs from my computer. You can do this with any type of design or image you can find or create. (Create a transfer with a laser printer) <---this is a great step by step explanation!
  I'm really loving the little white one. I may just have to keep that one for myself... I mean for in my little girl's room.

Thursday, January 14, 2016

Little Table Redo from Kiddie to Kiddie Chic

 
   I'm excited this will be my first project post of my new blog! This little table belonged to my mom and her sisters growing up. Let me tell you I'm 35 (on Sunday) so that sort of tells you how old this sweet table and chair set is. It is impeccable shape though. When I mentioned that to my mom she said "we were taught to take care of our things." I responded "oh you mean there were no boys in the house to destroy them." Nod.
  On to the project..... After a ton of sanding I used MinWax PolyShade espresso satin on the table top and chair seats. It's in the stain section of the hardware store , but it's supposed to be better to stain something in a darker shade without stripping. I did two coats but it still appeared streaky. The table top is cute like that though because that gave it a rustic farm table look. The light shade is actually paint I had left over from painting that little sweetheart in the photo's crib. It's a very very light grey.
   Here's the reveal! Not too shabby. Thanks for looking.

Blog World is Not on my Side

   Well, I'm not sure what happened, but my previous blog myinvisibleinkstudio.blogspot.com has magically been deleted from Blog World and no one seems to be able to offer any assistance. I'm saddened by the posts and comments that I lost, but the creating and talking about it must go on! Here is my new beginning.